
DIY Home Repairs for Beginners: Are you tired of calling a handyman every time something goes wrong in your home? Do you want to save money on repairs and feel accomplished by fixing things yourself? Then, you have come to the right place!
The Ultimate Guide to DIY Home Repairs for Beginners will equip you with the knowledge and tools you need to tackle any home repair project with confidence. From basic plumbing repairs and electrical fixes to drywall and painting tips, this guide covers everything you need to know to get started.
You will learn about the essential tools you need in your toolbox, safety tips to keep in mind, and step-by-step instructions to complete each project. Whether you are a complete beginner or have some experience, this guide is designed to help you become a DIY home repair expert in no time.
So, roll up your sleeves, put on your safety glasses, and let’s get started!

Essential Tools for DIY Home Repairs
You’ll need some must-have tools to tackle any fix-it job around the house. First on the list are power tools, such as a cordless drill, circular saw, and jigsaw. These will make cutting, drilling, and shaping materials much easier and faster than using hand tools. When choosing power tools, look for ones that are comfortable to hold and have adjustable speed settings for greater control.
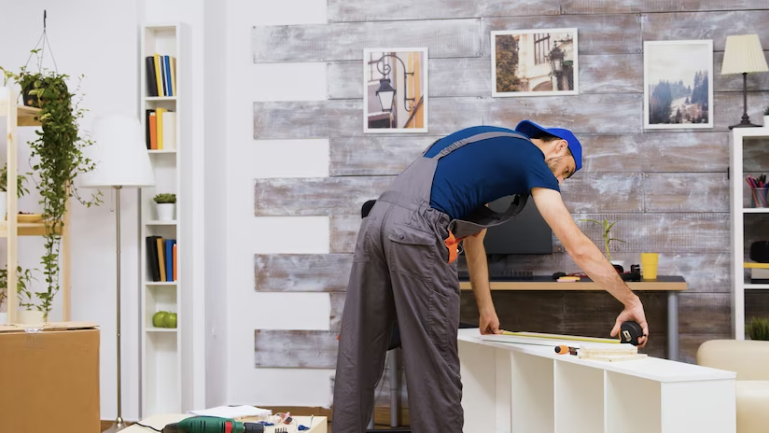
Measuring and cutting techniques are also important for DIY home repairs. You’ll need a measuring tape, level, and square to ensure accurate cuts and installations. A good set of saws, including a handsaw and hacksaw, will come in handy for cutting through wood and metal. Remember to take safety precautions when using any type of cutting tool, and always wear protective gear like eye goggles and gloves.
With these essential tools in your arsenal, you’ll be ready to tackle any DIY home repair project that comes your way.
Basic Plumbing Repairs
If your pipes are the veins of your home, then basic plumbing repairs are like first aid for your cardiovascular system. As a beginner, it’s important to start with the basics before tackling more complex plumbing issues.
Two common repairs you may encounter are replacing faucets and unclogging drains. Replacing a faucet may seem daunting, but it’s actually a fairly simple process. First, turn off the water supply to the faucet. Then, use a wrench to loosen and remove the nuts holding the faucet in place. Once the nuts are removed, lift the faucet off the sink and remove the old gasket and mounting hardware. Install the new gasket and mounting hardware, and then place the new faucet onto the sink. Finally, tighten the nuts and turn the water supply back on to test your new faucet.
Unclogging drains is another basic plumbing repair you can do yourself. Start by removing the drain cover and using a plunger to create suction and dislodge any clogs. If the plunger doesn’t work, try using a drain snake to physically remove the blockage. For stubborn clogs, you may need to use a chemical drain cleaner, but be sure to follow the instructions carefully and take proper safety precautions.
With these basic plumbing repairs under your belt, you’ll be ready to tackle more advanced projects in no time.
Electrical Repairs Made Easy
Now that you’re diving into electrical repairs, let’s simplify the process with easy-to-follow steps and tips to help you confidently tackle any wiring issue in your home.
First and foremost, it’s crucial to prioritize electrical safety. Always turn off the power source at the breaker before starting any repair work. Wear rubber-soled shoes and rubber gloves when handling electrical wires to avoid getting shocked. Remember, even small amounts of electricity can be dangerous.
When troubleshooting electrical issues, start by checking the breaker box to see if any switches have tripped. If so, turn them off and then back on to reset them. If that doesn’t solve the problem, check the outlet or light switch for loose connections or burnt-out components.
Use a voltage tester to check for live wires before touching them. And if you’re not confident in your ability to handle the repair, don’t hesitate to call in a professional electrician.
By following these tips and taking proper safety precautions, you can successfully tackle electrical repairs in your home.
Fixing Drywall and Painting Tips
As you dive into fixing drywall and painting, these easy-to-follow tips will help you achieve a professional-looking finish in your home.
When repairing holes in drywall, start by cleaning the area around the hole with a dry cloth. Next, fill the hole with spackling or joint compound using a putty knife. Allow the compound to dry completely, then sand the surface smooth. Repeat the process until the surface is even with the surrounding area.
Choosing the right paint is also important when it comes to achieving a professional look. Consider the type of paint you want to use, such as latex or oil-based, and the finish, such as matte or glossy. It’s also important to choose the right color for the room and to use a high-quality paint brush or roller.
Take your time and apply the paint in thin, even coats, allowing each coat to dry completely before applying the next one. With these tips, you’ll be able to repair holes in drywall and paint your home like a pro.
Safety Tips for DIY Home Repairs
You can ensure your safety while tackling home repairs by following these easy-to-follow safety tips. First and foremost, always wear appropriate protective gear such as safety glasses, gloves, and sturdy shoes. This will help prevent injuries from flying debris, sharp edges, and heavy objects.
In addition, it’s important to have emergency preparedness in mind. Keep a first aid kit nearby and know the location of the nearest emergency room. Familiarize yourself with the location of the main shut-off valves for water, gas, and electricity in case of any emergencies.
Lastly, to avoid common DIY injuries, stay alert and focused on the task at hand. Avoid distractions like phone calls or music that could take your attention away from the repair. By following these simple safety tips, you can confidently tackle DIY home repairs without putting yourself in harm’s way.
Getting your home ready for the colder weather will help you enjoy the season. Read More!
Frequently Asked Questions
How do I know when a DIY repair is beyond my skill level and requires a professional?
Assessing your DIY limitations is crucial to knowing when to hire a professional for a repair. If you’re unsure about the scope or complexity of a project, it’s better to err on the side of caution and get an expert’s opinion.
Some tasks, like electrical work or plumbing, require specialized knowledge and training. If you’re not confident in your ability to complete the repair safely and effectively, it’s time to call in a professional.
Additionally, if you start a project and realize it’s more complicated than you thought, don’t hesitate to seek help. Remember, hiring a professional may cost more upfront, but it can save you time, money, and frustration in the long run.
What are some common mistakes beginners make when attempting DIY home repairs?
When it comes to DIY home repairs, it’s easy to get caught up in the excitement of fixing things yourself. But as with any new skill, there are common mistakes that beginners make.
Imagine you’re a chef in training, learning to make a soufflé. You need to be precise with your measurements, timing, and temperature to get it perfect. The same goes for DIY repairs.
One common mistake is rushing through the job without proper preparation or troubleshooting. Take the time to research, gather the necessary tools and materials, and troubleshoot any potential issues before starting.
Another mistake is not following instructions or guidelines. It’s important to read through instructions carefully and follow them step-by-step. Don’t skip any steps or take shortcuts, as this can lead to bigger problems down the line.
With these common mistakes in mind, along with some troubleshooting tips, you’ll be well on your way to successful DIY home repairs.
Are there any specific safety precautions to take when working on older homes?
When working on older homes, there are specific safety precautions you need to take.
First, make sure you have the proper safety equipment, including a hard hat, gloves, and safety goggles.
You also want to be aware of common hazards, such as lead paint, asbestos, and mold. When working with these materials, it’s important to wear a respirator and work in a well-ventilated area.
Additionally, you should have someone else with you while you work in case of an emergency.
Finally, make sure you turn off the electricity and gas before beginning any repairs to avoid potential accidents.
By taking these safety precautions, you can ensure that you stay safe while working on older homes.
How do I properly dispose of materials and debris from my DIY home repair projects?
When it comes to waste management for your DIY home repair projects, it’s important to consider environmentally friendly disposal methods.
You don’t want to contribute to the already overflowing landfills with hazardous materials and debris.
Instead, look for local recycling centers or donation centers that accept materials such as glass, metal, and wood.
You can also compost organic waste like yard trimmings and food scraps.
For hazardous materials like paint and chemicals, check with your local government for proper disposal guidelines.
By taking these steps, you can ensure that your DIY home repairs are not only functional but also sustainable.
What are some budget-friendly alternatives for expensive tools and materials needed for home repairs?
Looking for ways to save money on your DIY home repair projects? Don’t worry, there are plenty of budget-friendly alternatives to expensive tools and materials.
Instead of buying specialized tools for each project, look for multi-purpose tools that can be used for multiple tasks. For example, a basic set of pliers can be used for everything from tightening nuts and bolts to cutting wires.
You can also save money on materials by using recycled or repurposed items. For example, instead of buying new wood for a project, look for old pallets or scrap wood that can be sanded down and reused.
With a little creativity and some DIY home repair tips, you can save money on your next project without sacrificing quality or safety.
Conclusion
Congratulations! You’ve made it to the end of the ultimate guide to DIY home repairs for beginners. You now have the knowledge and confidence to tackle basic plumbing and electrical repairs, fix drywall, and paint your walls like a pro.
Remember, DIY home repairs can be a rewarding and cost-effective way to maintain and improve your home. However, safety should always be your top priority. Just like a surgeon needs their tools, you need your safety gear.
Always wear gloves, safety glasses, and a mask when working with tools or chemicals.
In conclusion, with the right tools, knowledge, and safety precautions, you can successfully complete DIY home repairs. As the famous simile goes, “Practice makes perfect.” So, start small and work your way up to more complex repairs. Before you know it, you’ll be a DIY pro and your home will be in top shape. Good luck!